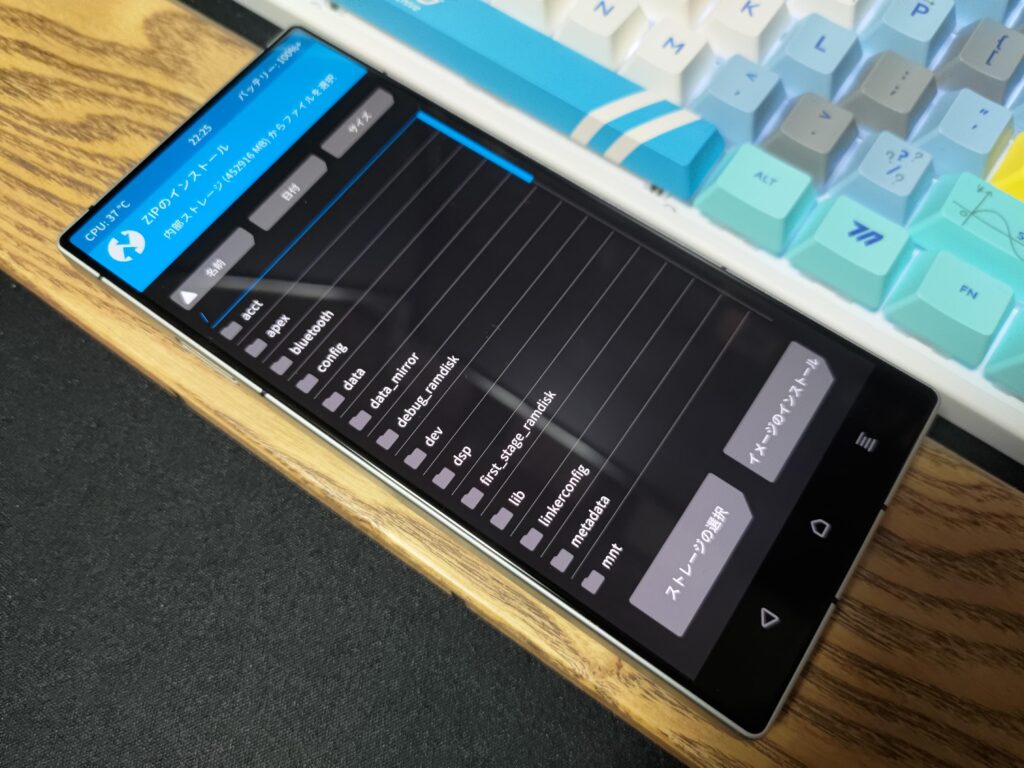
Info:
This article is a translation of an article I wrote before.
Maybe there are people who need this information. So I have created an article translated into English.
However, since my native language is Japanese, it may contain sentences that are not accurate.
If you can read Japanese, I recommend that you read the original article.
!!! WARNING !!!
Any modification of the device is at your own risk and I am not responsible for any failures.
Unlocking the bootloader will void the manufacturer's warranty.
Please make sure you understand these things.
!!! If the device is in a bootloop !!!
Don't give up! Most of the time you can unbrick!
[MEMO] REDMAGIC 9 Pro (NX769J) | How to flash EDL ROM using QFIL [Unbrick]
Added on June 4, 2024
ZTE Family Toolbox solves everything! This tool makes it relatively easy to BLU, root, and create EDL ROMs for ZTE devices, including REDMAGIC. No Zadig driver is required.
Unlock steps #3-5 can be completed with this tool.
General - ZTE Family Toolbox | XDA Forums
Information as of April 24, 2024
REDMAGIC 9 Pro has not been able to unlock the Bootloader until now, but now that the Engineering Bootloader has been leaked (why?), the Bootloader can be unlocked. This is a great thing!
This is a memorandum for myself, so read the version appropriately.
Incidentally, in addition to the 9Pro+ (Chinese ver), the Nubia Z60 Ultra is also apparently supported.
Many thanks to all at XDA Forums.
👇👇👇👇👇
How To Guide - Redmagic 9 Pro Bootloader Unlock | XDA Forums
👆👆👆👆👆
Contents
What to prepare
Common
- Windows PC with adb/fastboot
- I'll spare you the installation instructions. If you are lazy, you can use Minimal ADB or Fastboot, but these are outdated, so it is better to install the latest platform-tools.
SDK Platform-Tools
[TOOL]Minimal ADB and Fastboot [2-9-18] | XDA Forums
- I'll spare you the installation instructions. If you are lazy, you can use Minimal ADB or Fastboot, but these are outdated, so it is better to install the latest platform-tools.
Bootloader Unlock
- RM9 TOOLBOX
- Same link as listed in XDA above.
Nubia Z60 Ultra/REDMAGIC 9 Pro Toolbox
Mirror: Google Drive
- Same link as listed in XDA above.
- Zadig
- As explained in the XDA above, use to install the driver.
Zadig - USB driver installation made easy
- As explained in the XDA above, use to install the driver.
TWRP Installation
- TWRP
- TWRPNX769J.img attached to the following XDA
[RECOVERY][UNOFFICIAL] TWRP Red Magic 9 Pro (NX769J) | XDA Forums
- TWRPNX769J.img attached to the following XDA
- DFE NEO v2
- This TWRP does not (at least at this time) support encryption. Therefore, it is necessary to decrypt the storage, although security is reduced.
The difference between the regular and lite versions seems to be whether Magisk is included or not. Magisk will be installed later, so use arm64-v8a-en-DFE-NEO-2.5.1-lite.zip this time.
GitHub - leegarchat/dfe-neo-v2
- This TWRP does not (at least at this time) support encryption. Therefore, it is necessary to decrypt the storage, although security is reduced.
root
- Magisk
- You can choose the original RELASE or the CANARY version, Kitsune Mask or otherwise, whatever you like.
This time I chose Alpha.
Why is the icon Closure?
Telegram: Contact @magiskalpha
- You can choose the original RELASE or the CANARY version, Kitsune Mask or otherwise, whatever you like.
Bootloader Unlock
As always, don't forget to back up your data as all data will be erased.
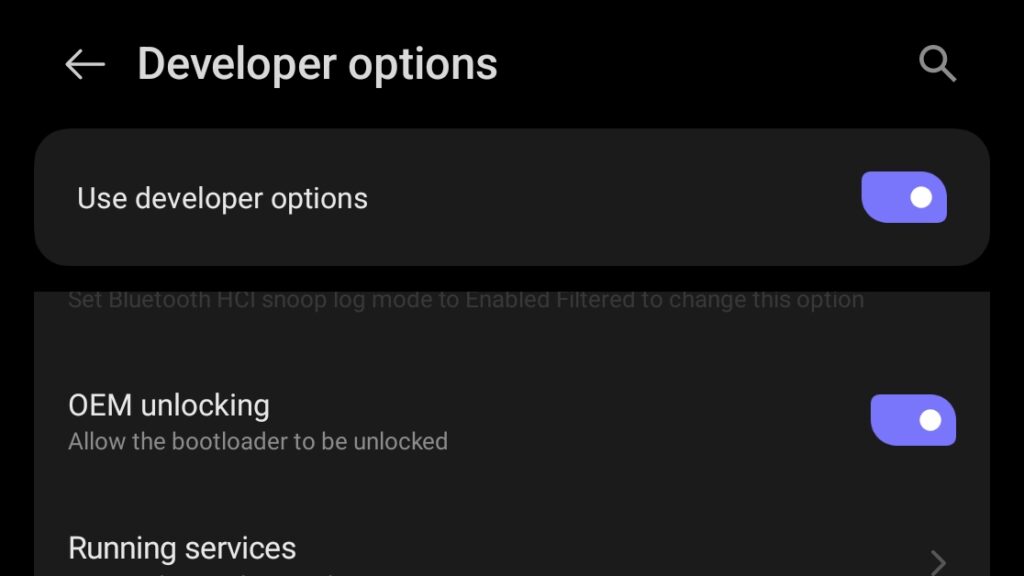
1. OEM unlocking
2. Connect in EDL mode
After turning off the power, connect the USB cable while simultaneously pressing the up and down buttons of the volume key.
The screen remains dark, but a device with a name like "QUSB_BULK" appears in the Device Manager.

3. Driver Installation
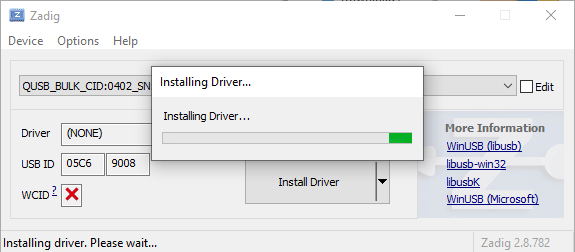
Start Zadig, select QUSB_BULK, and press Install Driver.
If the warning symbol disappears from the Device Manager, it's OK.
4. Flashing the ENG bootloader
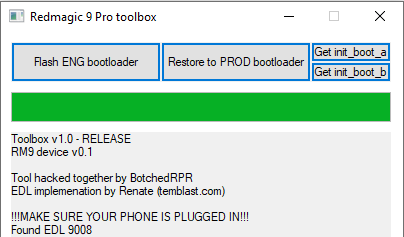
Start rm9-toolbox.exe and press the "Flash ENG Bootloader" button to write the bootloader.
Press "Get init_boot" button to get init_boot.img. This time, it is not necessary since TWRP is used, but it is recommended to acquire it since it will be required when rooting Magisk by itself.
To exit EDL mode, simply press and hold the power button, but you must hold it down rather long. Holding it down until the device vibrates should reboot and boot the system. If the system was started in recovery mode, select "Reboot System".
At this point, the data has not yet been lost. You can still go back.
5. Unlocking!
The next step is to reboot into the bootloader. The process from here is the same as for other models.
If the system is running, it is easier to use the ADB command:
adb reboot bootloaderAs soon as you run it, it should reboot and boot the bootloader. USB cable can be left connected.
After the PC recognizes the fastboot device, unlock it with the following command:
fastboot flashing unlockA confirmation screen will appear on the device, and when you have made up your mind, unlock it!
At this point, all data will disappear. Good-bye!
If you see "DEVICE STATE - unlocked", you have successfully unlocked the device. After rebooting the system, the initial setup should launch.
If you are installing Magisk only, proceed with the setup as is.
When installing TWRP, the data will be lost once again. Power off, or proceed with the setup and make the ADB command available.
TWRP Installation
👇👇👇👇👇
[RECOVERY][UNOFFICIAL] TWRP Red Magic 9 Pro (NX769J) | XDA Forums
👆👆👆👆👆
At least at this time, this TWRP does not support storage decryption. Therefore, storage cannot be accessed from TWRP without removing storage encryption.
Magisk can be installed without TWRP. In my opinion, only those who want convenience at a reduced security level should install it. I installed it, though.
1. Flashing the TWRP
First, boot into fastboot.
If it is in power-off state, a long press of "Vol down + Power button" should boot fastboot.
When the unlock warning screen appears, releasing the "Power" button and holding down only the "Vol down" button may make it easier to boot. You should also be able to release the ”Vol down” button from when the REDMAGIC logo appears after the warning screen.
If the system is running and the ADB command is available, just run this command:
adb reboot fastbootAfter booting into fastboot mode, flash the recovery image.
Since this is an A/B partition system, you can choose which slot to flash. I recommend flashing both unless there is a particular reason not to.
fastboot flash recovery_a TWRPNX769J.img
fastboot flash recovery_b TWRPNX769J.img
This command can be executed without specifying a slot. In this case, it is flashed to the currently active slot. For example, if slot A is active, it means that recovery_a is specified.
fastboot flash recovery TWRPNX769J.img2. Boot into TWRP
The next step is to boot TWRP. Probably it would be better to unplug the USB cable once.
I think it was... that I had to power off once to load. So power off the device. From the power-off state, press and hold "Vol up + Power" button to enter recovery and TWRP will boot.
As with fastboot, when the unlock warning screen appears, releasing the "Power" button and holding down only the "Vol up" button may make it easier to boot. You should also be able to release the ”Vol up” button from when the REDMAGIC logo appears after the warning screen.
At this point, the storage is encrypted, so even if you proceed to the “Install” section of TWRP, you will not see anything in the storage. There may be a few other errors, but ignore them for now.
The working order is important from here! Do not skip the order!
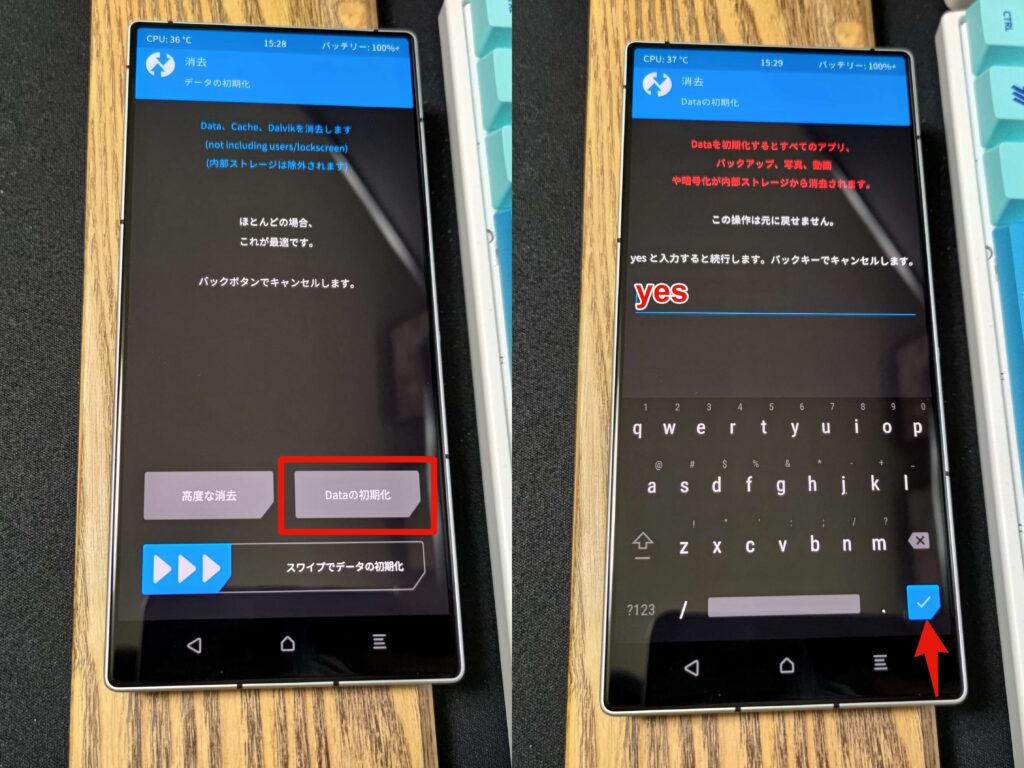
3. Formatting Storage
Format the storage first. Data will be lost, but it's already gone, so no problem, right?
Select “Wipe" > "Format Data” and type “yes” then press ✅️
I believe ✅️ had to be pressed twice.
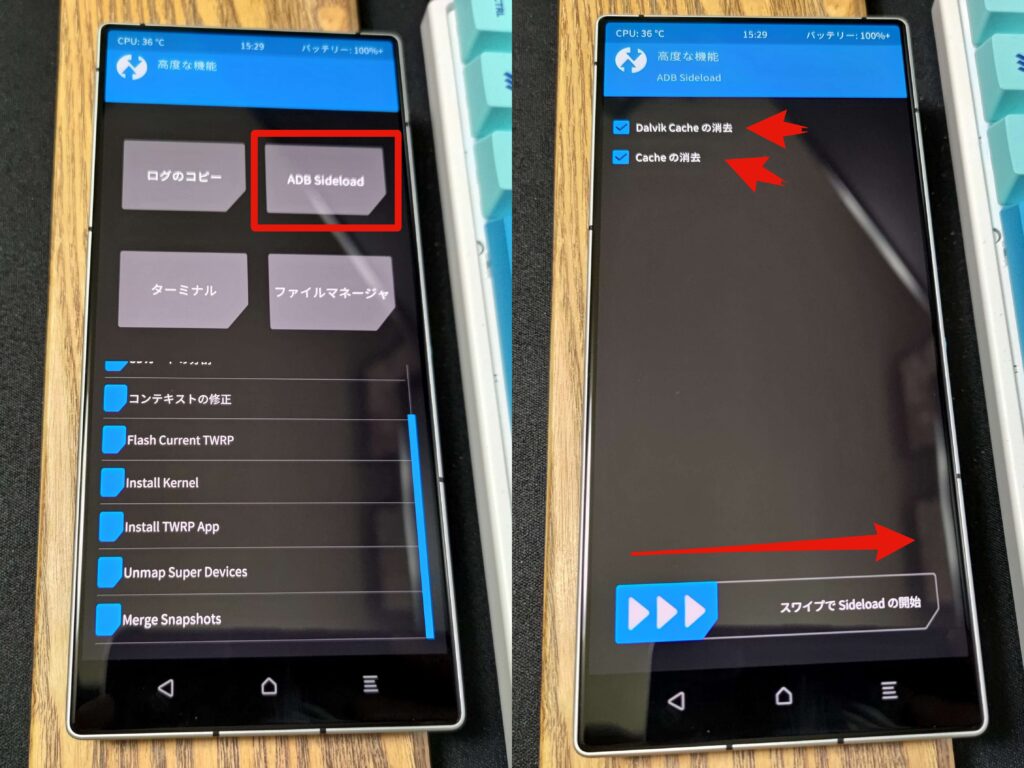
4. Sideload the DFE
Go to “Advanced” > “ADB Sideload” without rebooting.
Check both “Wipe Dalvik” and “Wipe Cache” and swipe to launch Sideload.
Connect the USB cable and sideload the DFE with the following command:
adb sideload arm64-v8a-en-DFE-NEO-2.5.1-lite.zipWhen sideloaded and the script starts running, you will be asked several questions, answer NO (press the vol down) to all of them. If any item is selected YES, it will bootloop, but sideload and answering again seems to fix it.
When you finish answering the questions, you will be asked if this setting is OK at the end. Only at that time, select YES (press the vol up).
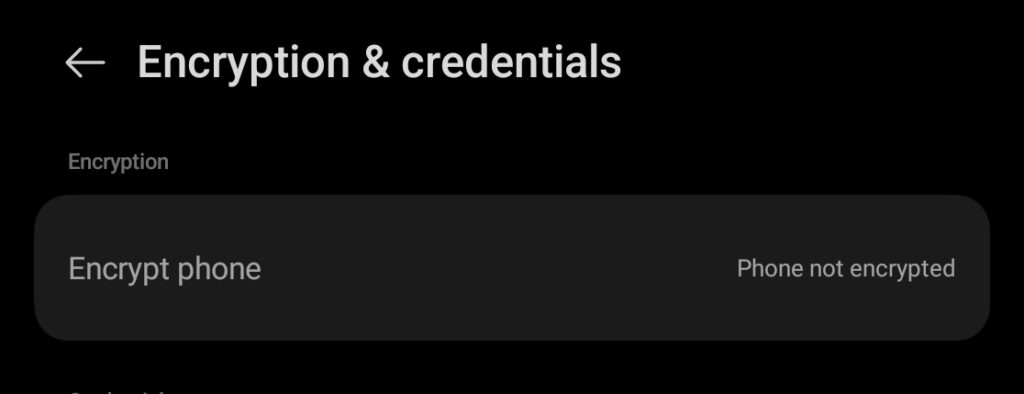
5. Setup without lock screen setting
After installing the DFE, start the system. The initial setup will begin, but be sure to complete the setup without setting the lock screen.
At this point you will be able to confirm that it is not encrypted.
6. Check from TWRP
After the initial setup is complete, reboot into TWRP. Go to the “Install” section and you should be able to see the data in storage.
TWRP installation is now complete. Congratulations!
After this, there is no problem to set up a lock screen and add fingerprint or face recognition.
root
If TWRP is already installed
Rewrite the Magisk extension from .apk to .zip and install from TWRP.
That is all.
If TWRP is not installed
No different from other models.
Patch the init_boot obtained by rm9-toolbox with Magisk, transfer it to the PC and flash it with the fastboot command.
fastboot flash init_boot_a pached.img
fastboot flash init_boot_b pached.img
As with recovery, if a slot is not specified, it is written to the currently operating slot.
fastboot flash init_boot pached.imgStopped working app
EDIT: 2024/7/12
The e+ problem was solved by APatch.
HideMyApplist may have caused a malfunction. Details are at the bottom of this article (Japanese only).
---
It is considered to be recognized as a custom ROM. Some apps are not working.
I tried these combinations but could not launch the app. If anyone knows a workaround, please let me know...
- Magisk 27.0 + Play Integrity Fix 15.9.7 + Shamiko 1.0.1 + Hide My Applist 3.2 + IAmNotADeveloper 1.2.0
- Magisk Canary 27002 + Play Integrity Fix 15.9.7 + Shamiko 1.0.1 + Hide My Applist 3.2 + IAmNotADeveloper 1.2.0
- Kitsune Mask Canary 27001 + Play Integrity Fix 15.9.7 + Hide My Applist 3.2 + IAmNotADeveloper 1.2.0
- Magisk Alpha 27002 + Play Integrity Fix 15.9.7 + Shamiko 1.0.1 + Hide My Applist 3.2 + IAmNotADeveloper 1.2.0
- Magisk Alpha 27002 + Play Integrity Fix 15.9.7 + Shamiko 1.0.1 + Hide My Applist 3.2.r414.1b2a52e (reference)+ IAmNotADeveloper 1.2.0
Apps that don't work (as checked)
- e+
- This is a famous event ticket app in Japan. It is known for its excessive root measures. I will respond with a sub device.
- Adobe Account Access
- It's okay, it's not mandatory. Really? No, not well.
- Netflix
- I tried to check the status of Widevine support but it didn't work. Well, I don't use Netflix, so it's not a problem for me.
Apps that worked
For most apps, this can be avoided by setting DenyList (MagiskHide). Apps that check USB debugging can also be bypassed by basically using IAmNotADeveloper.
By the way, PrimeVideo was available in the best quality. This means that Widevine L1 is supported.
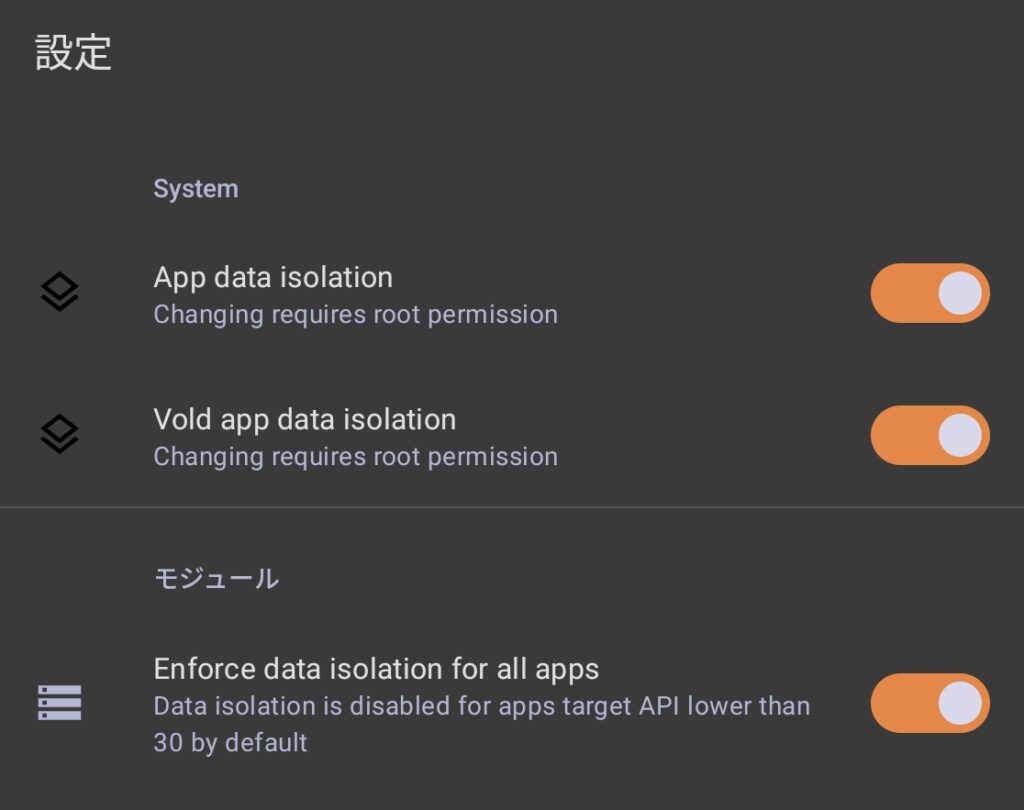
There is an app called Vpass. It is an app of Sumitomo Mitsui Card. This worked by enabling “void app data isolation” in the Data isolation settings of Hide My Applist.
